Normally when I visit a blog it is to view a specific recipe or product etc. If you’re like me you’re not going to be interested in why I decided to combine these flavours together or what the weather may have been like while I was making them!
However, a few notes though before you get stuck in…
1. If you think you don’t like dates…try them! Honestly, they are so sweet and sticky they are SO underrated. I have heard so many people saying “Oh I don’t like dates…” yeah, you may not like the texture / taste of them as a piece of dried fruit to eat but incorporated into a recipe I promise they are amazing! They add such a nice sweetness, almost like a caramel flavour to recipes. Don’t write them off!
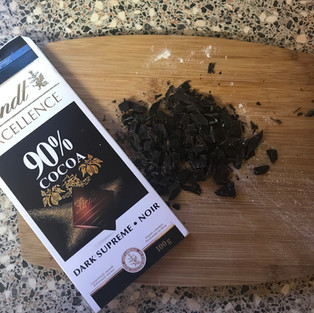
2. I used a really bitter chocolate in these. A lot of people don’t love bitter chocolate which is fair enough. So if that is you, just substitute to your favourite. You can even use white or milk chocolate here but I think the flavour of dark chocolate complements the dates and the little hint of nutmeg so much better
3. If you genuinely don’t like dates or chocolate…leave them out! These can be made as plain scones. Add in cinnamon and raisins. Or white chocolate and cherries. Let your mind run free and don’t be afraid to experiment…what’s the worst that can happen?!
PS if you're interested...it was raining!
Ingredients
300g self raising flour, plus extra for dusting
75g cold block butter (not tub)
¼ teaspoon freshly ground nutmeg (or ½ teaspoon ground nutmeg)
75g dried dates
3 squares of Lindt 90% dark chocolate
55g golden caster sugar
150-155ml butter milk
1 egg yolk
Tablespoon of hot water
Method
1. Preheat the oven to 175oC, fan. Place a silicon mat (I use Seraphina’s non-stick baking mat) and place it on a large baking sheet
2. Weigh the flour and nutmeg, sift into a large mixing bowl
3. Cut the butter into small cubes and place into the flour. Using your fingertips, rub the flour and butter together to create a crumb like texture. Stir in the sugar, mixing well to ensure it is evenly distributed throughout
4. Using sharp kitchen scissors, cut the dates up into small pieces (similar to size of a raisin) and place into a small bowl
5. Next, using a sharp knife cut the chocolate into small pieces, again similar in size to a raisin and place into the bowl with the dates
6. Add a tablespoon of flour over the dates and chocolate and mix well to ensure the dates and chocolate are covered in a light coating of flour – this will help stop them sinking during baking
7. Add the dates and chocolate into the flour, butter and sugar and mix well
8. Next, create a well in the middle of the bowl. Measure the buttermilk and pour it into the well
9. Using a palette knife cut through the mixture going from one ide of the bowl to the next until the dough starts to become ragged and just starting to come together. At this stage, use your hands to pull the dough together to create a ball
10. Place the dough out onto a lightly floured work surface and using the palm of your hand, flatten the dough until it is about an inch thick. Using a lightly floured scone cutter, cut out the scones and place them on to your baking tray
11. Place the egg yolk into a small cup, add the tablespoon of hot water and mix. Using a pastry brush give the scones a light coating of egg wash
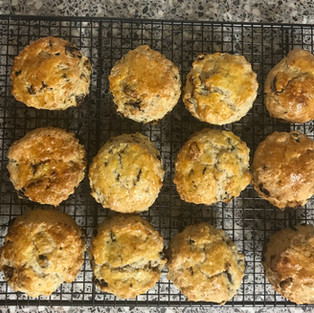
12. Place into the preheated oven for 15-20 minutes until the scones are a nicely rise and a golden colour
13. Place onto a cooling rack to cool slightly.


Commentaires